I'm one of those people that gets bored with solid nail colors. I've sported stripes, polka dots, & chevron prints, all of which I've done myself! One type of nail decor I hadn't tried yet was a swirly, marble-like mix of colors, so I decided to do it myself!
Inspiration:
Inspiration:
Getting Started!
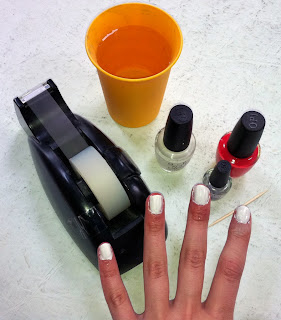
What you will need:
- White Nail Polish (base coat)
- 2+ Nail Polish colors of your choice
- Clear Nail Polish (finish)
- 1 glass or bowl of water
- Scotch tape
- 1 toothpick
- 2 hands in need of a manicure! ;)
Step 1:
Paint your nails white so the swirled polish will show up nice and bright!
Step 2:
Tape your fingers as best as you can around your nailbeds with scotch tape (it's okay if some spots of skin are exposed!)
Step 3:
One by one, put drops of nail polish into the cup of water in any order to create a ring effect (I only used 2 colors so I just alternated colors)
Step 4:
Take toothpick to create a design of your liking (remember that each nail is going to look different, so don't fret if your in-water design isn't exactly what you want!)
Step 5:
One by one, dip nails into water. I found that the best approach is to have the nail hit the water before the rest of the finger so that it picks up most of the polish. When your fingers are in the water, take the toothpick and collect all the excess nail polish in the surrounding water so when you pull your finger out it doesn't ruin the design.
Thumbs too!
It will look kind of messy at first with extra polish on the tape, but you'll see that each nail is unique and received a good variety of color :)
Step 6:
Remove tape from fingers
Step 7:
Use cotton Q-tip and nail polish remover around nails to remove any excess polish that might have gotten on your skin.
Step 8:
Apply clear coat of nail polish for a glossy, finished look and protection!
And you're done!
So simple, more unique than stick on nails, and you can brag about how you did it yourself!
& for the best part..
Total cost:
Free! You probably have all of the supplies needed already!
Go ahead & shoot your nail lady a text to cancel this week's appointment, tell her you're going to DIY!
Stay tuned for more from ReVamped Vintage!!
- A.P.


No comments:
Post a Comment